Yes. Lifters can reliably improve hip mobility with targeted drills and a structured load-integration plan, usually inside four weeks of consistent work.
Here's something you can do right now, before you finish reading: drop into a 90/90 position (front shin rotated in, back shin rotated out, both knees bent) and switch sides slowly for 60 seconds. That single move tells you a lot about which hip is the problem child.
Your starting checklist:
- Test both hips in a deep squat and a 90/90 switch to spot the tighter side
- Start with two drills: loaded 90/90 switches and deep goblet squat holds
- Work on it 3 to 5 times a week for four weeks before expecting real transfer under the bar
Pro Tip: Before you chase range, exhale fully and feel your ribs drop toward your pelvis. If you can't keep that brace during a 90/90 switch, you're compensating through your lower back, not actually gaining hip mobility.
Key Takeaways
Improving hip mobility for lifters requires testing first, prioritizing motor-control drills over static stretching, and integrating new range under load across a measured four-week block.
| Point | Details |
|---|---|
| Test before you guess | Run the deep squat/OHSA and 90/90 active vs. passive test to find your limiting side and plane. |
| Watch the 15-degree gap | An active-passive gap over 15 degrees points to a motor-control issue, not tightness. |
| Sequence your drills | Go soft tissue and activation, then active mobility, then loaded positional holds, in that order. |
| Follow the 4-week split | Spend weeks 1-2 on passive range, weeks 3-4 on active range with load integration. |
| Use Ironatforty's tools | Pair drills with the site's warm-up guides and 1RM calculator to pace load-integration weeks. |
Table of Contents
- Why Hip Mobility for Lifters Actually Matters Under the Bar
- What Tests Reveal Your Tight Hips When Squatting
- The Essential Hip Mobility Drills for Squats and Olympic Lifts
- Building a 4-Week Hip Mobility Plan Around Your Training
- Cues and Breathing That Protect Your Lower Back
- Red Flags That Mean Mobility Work Isn't the Fix
- A Practical Note From a Lifter Who's Not in a Hurry Anymore
- Pair This Hip Work With the Right Tools From Ironatforty
- Sources
- FAQ
Why Hip Mobility for Lifters Actually Matters Under the Bar
Tight hips don't just feel stiff. They rewrite your technique whether you notice it or not.
When hip flexion or internal rotation runs short, your body finds range somewhere else, usually your lumbar spine. That's the "butt wink" you see at the bottom of a squat, and it's not a flexibility flex. It's your spine bailing out your hips. A restriction as small as 5 to 15 degrees can be the difference between hitting depth cleanly and rounding your lower back to get there.
The same limitation shows up differently in Olympic lifts. Catching a clean or snatch demands real hip flexion and external rotation to sit into a stable front or overhead squat. Restricted hips increase lumbar flexion under load and compromise that stability right when you need it most, according to a sports physical therapy resident's evidence-based review.
There's a measurable threshold here, too. Total hip rotation, internal plus external, under roughly 70 degrees is linked to higher injury risk. That's not a scary number to memorize; it's a reason to test before you guess.
- Limited hip flexion forces lumbar rounding at squat depth
- Restricted internal/external rotation compromises the catch in cleans and snatches
- Poor hip extension shortens your pull and changes deadlift mechanics, since hip extension demand shifts with load and moment arm
That's exactly why testing comes before drilling. Guessing which plane is tight wastes training time you don't have to waste.
What Tests Reveal Your Tight Hips When Squatting
You don't need a physical therapy clinic to find your limiting plane. You need five minutes and a mirror.
Run through these in order:
- Deep squat / overhead squat assessment (OHSA): Drop into a bodyweight squat, arms overhead. Watch for one heel lifting, one knee caving in, or your torso twisting to one side.
- 90/90 active vs. passive test: Sit in 90/90, lift your front knee off the ground actively, then use your hands to pull it higher passively. A big gap between the two tells you something important.
- Seated internal/external rotation: Sitting with knees bent at 90 degrees, rotate your shins in and out. Compare sides. Big asymmetry points to a specific hip, not general "tightness."
- FABER / Figure-4 test: Lying down, cross one ankle over the opposite knee and let the bent knee drop toward the floor. A knee that won't drop signals hip external rotation restriction, often adductor-driven.
- Single-leg hip CAR check: Standing on one leg, draw slow circles with the other knee at max range. Look for grinding, catching, or a spot where control breaks down.
Here's the part most lifters miss: if your passive range beats your active range by more than about 15 degrees, that's not a flexibility problem. That's a motor-control problem. Your hip can get there; your nervous system just doesn't trust that position yet. Stretching more won't fix that. Loaded control drills will.
Pro Tip: If your hip tests come back clean but your squat depth still stinks, check your ankles and upper back before blaming your hips again. Poor ankle dorsiflexion or a stiff thoracic spine often masquerades as a hip problem.
The Essential Hip Mobility Drills for Squats and Olympic Lifts
Once you know which plane is limiting you, you don't need twenty drills. You need the right four or five, done consistently.
90/90 hip switches (unloaded and loaded)
This is the single best diagnostic-turned-drill in your arsenal. Sit with front shin rotated in, back shin rotated out, both knees at 90 degrees. Lift both knees slightly and rotate through to the mirror position without using your hands.
Do 2 to 3 sets of 8 to 10 controlled switches per side. Regress by using your hands to assist the switch. Progress by holding a light plate against your chest to add load, or by pausing 3 seconds at the top of each rotation.
Deep goblet squat holds
Hold a kettlebell or dumbbell at chest height and sink into the deepest squat you can control, elbows inside your knees, gently pressing them out. This drill builds the exact end-range position your working squat demands, which is why applied coaching guides for Olympic weightlifting lean on it so heavily.
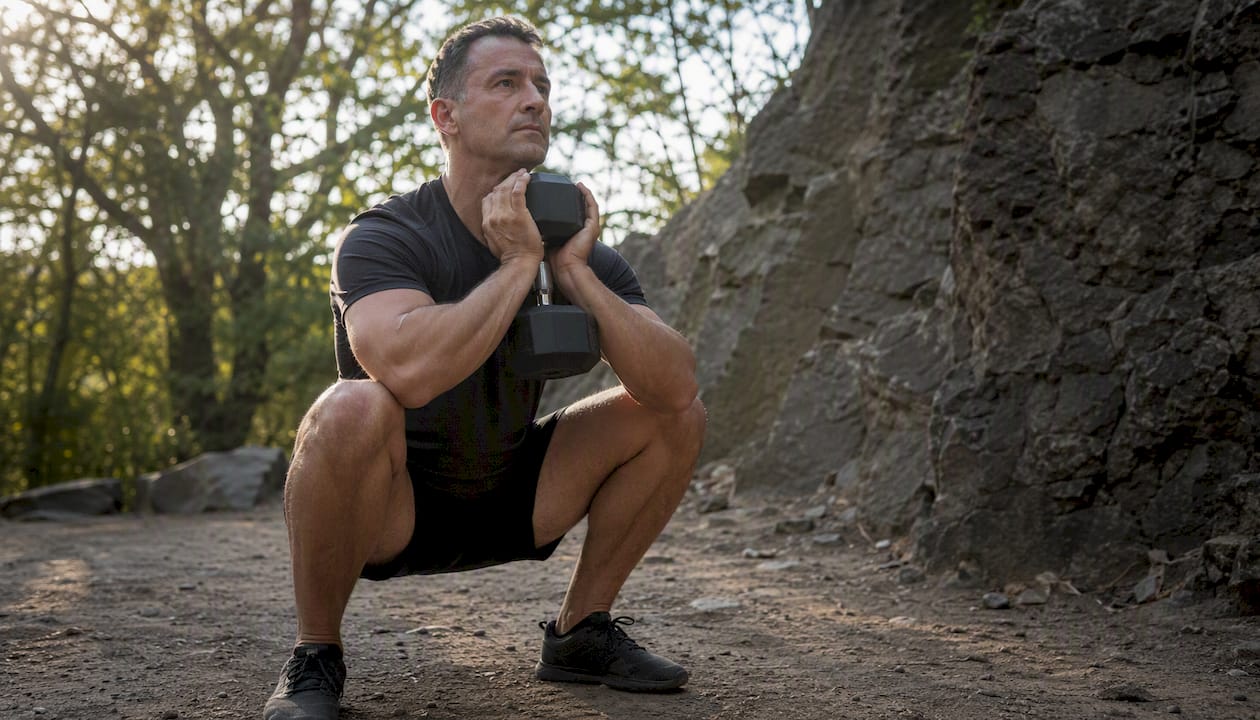
Hold for 60 to 90 seconds total, broken into 3 rounds if needed. Regress with a box or bench under you for a partial range. Progress by adding a slow 3-second rock forward and back at the bottom.
Hip CARs (controlled articular rotations)
Standing on one leg, draw the slowest, largest circle you can with your free knee, keeping your torso still. This isn't a warm-up throwaway. It's how you teach your nervous system that a new range of motion is safe to control, not just possible to reach.
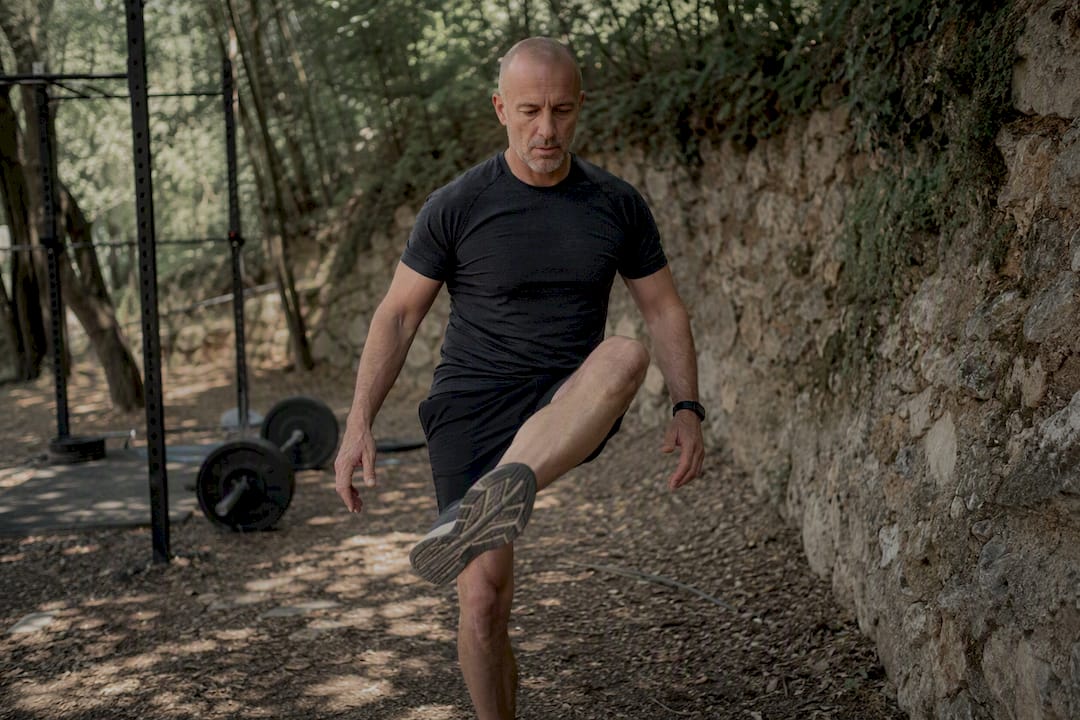
Run 2 sets of 3 to 5 slow circles per direction, per side. Regress by holding a wall for balance. Progress by closing your eyes to remove visual feedback.
PAILs/RAILs for internal and external rotation
Progressive and regressive angular isometric loading sounds technical, but it's simple: push into end-range internal rotation for 20 to 30 seconds (PAILs), then actively rotate further into external rotation for another 20 to 30 seconds (RAILs) without resetting the position. This end-range strength work is what actually converts passive flexibility into usable range.
Do 1 to 2 rounds per side, 2 to 3 times weekly. Regress with shorter holds at lower intensity. Progress with longer holds or added band resistance.
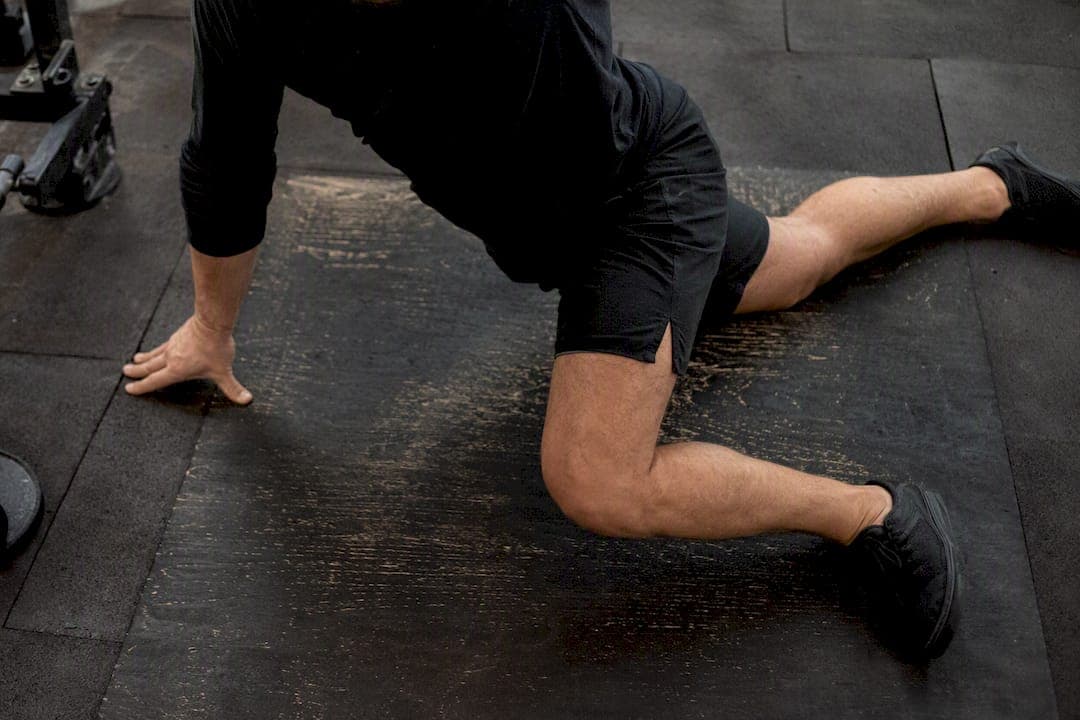
Adductor rockbacks
Kneeling with one leg extended straight to the side, rock your hips back over your bent knee to stretch the extended leg's adductor. This directly targets the internal rotation deficits that limit squat depth and clean catches, a drill BarBend's Olympic lift mobility routine recommends alongside loaded holds.
Do 2 to 3 sets of 8 to 12 slow rocks per side. Regress with a smaller range. Progress by adding a slight pulse at end range.
Supported Cossack squat / side-lunge mobilization
Holding a rack or rig for support, shift your weight side to side into a deep lateral lunge, keeping the loaded heel down as long as possible. This builds hip internal rotation and adductor length simultaneously, which pays off directly in wide-stance squat variations.
Do 2 sets of 6 to 8 reps per side. Regress by using a higher support point or shallower depth. Progress by removing the support entirely.
Banded hip distraction
Loop a heavy band around a rack at hip height, step into it so it pulls your femur into the socket, then move through squat patterns or 90/90 switches against the tension. The band creates joint space that often unlocks range instantly.
Do 8 to 10 reps per pattern, 2 sets. Regress with a lighter band. Progress with a heavier band or slower tempo.
Loaded positional holds (goblet or plate)
Once your active range improves, hold a loaded position (bottom of a goblet squat, deep 90/90 with a plate on your knee) for time. This is where mobility becomes strength, not just range.
Hold 30 to 45 seconds, 2 to 3 sets. Regress with bodyweight only. Progress by increasing load or depth.
Pro Tip: Pair every new range you unlock with a glute max and medius activation move, like a banded lateral walk or a slow single-leg bridge. New range that your glutes can't control under load just becomes a new way to get hurt.
Sequence matters more than most lifters realize, as highlighted in club rotation in skill development, where planning drill order maximizes training efficiency. Soft-tissue and activation work comes first, active mobility (CARs, 90/90 switches) second, and loaded positional holds last. Save PAILs/RAILs for when you have 10 focused minutes; save CARs for daily maintenance since they take under three minutes per side.
Building a 4-Week Hip Mobility Plan Around Your Training
Where you put this work matters as much as which drills you pick.
Dynamic primers belong before heavy sets, 5 to 12 minutes, moving through 90/90 switches, hip circles, and a few bodyweight goblet squats. Static holds and PNF-style stretching don't belong here. Heavy static stretching right before lifting can reduce your maximal force output, which is the opposite of what you want walking into a squat session. Save longer static and PAILs/RAILs work for dedicated 10 to 20 minute sessions, 3 to 5 times weekly, or for your cool-down and off days.
A four-week block that separates passive range work from active load integration reliably transfers gains to strength outcomes, provided you check progress objectively rather than by feel.
| Week | Focus | Session Time | Drill Examples | What to Track |
|---|---|---|---|---|
| 1-2 | Passive range and tissue release | 10-15 min, 4-5x/week | 90/90 switches, adductor rockbacks, banded distraction | Passive 90/90 depth, FABER knee height |
| 3-4 | Active range with load integration | 15-20 min, 3-4x/week | Loaded goblet holds, PAILs/RAILs, tempo squats | Active hip flexion under load, squat depth without wink |
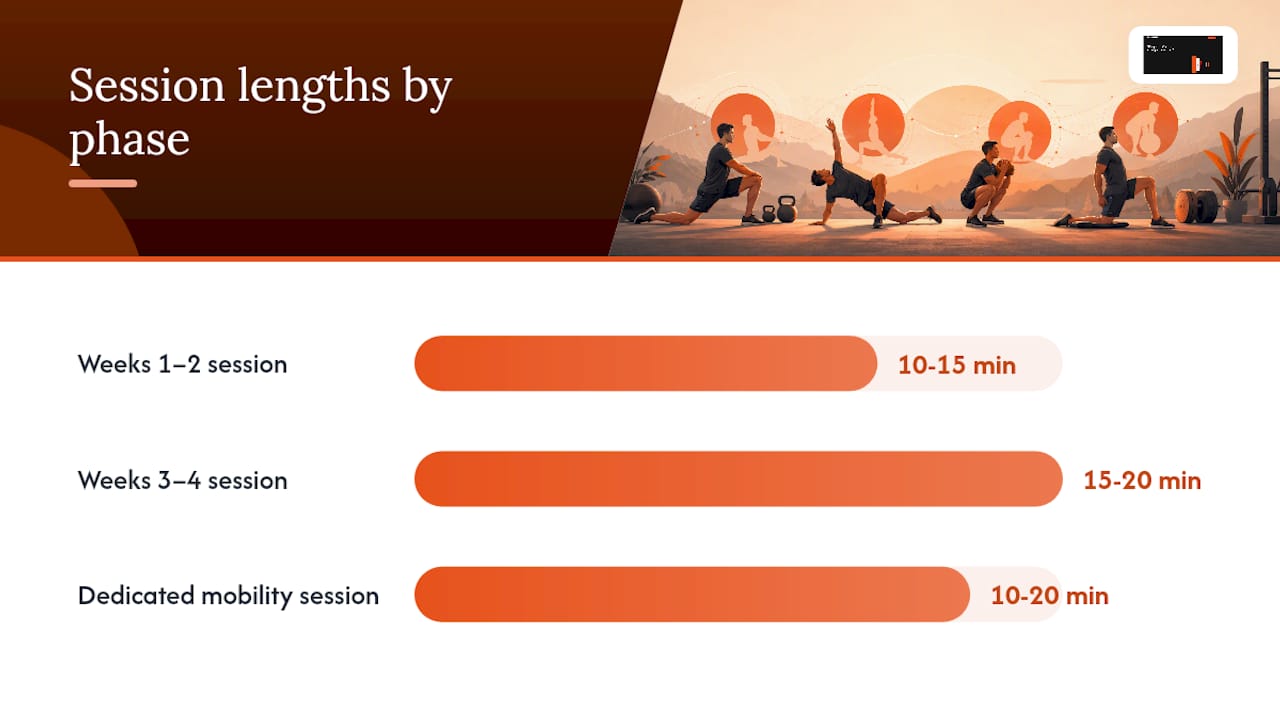
Move from passive holds to loaded holds once your active-to-passive gap on the 90/90 test closes to under 10 degrees. If it's still wide by week 3, spend another week on motor-control drills like CARs and PAILs/RAILs before adding load. Rushing that jump is the most common way lifters waste a four-week block. Pace load increases against your progressive overload plan so mobility gains and strength gains move together instead of competing for recovery.
Cues and Breathing That Protect Your Lower Back
Range without control is just a new way to get hurt, which is why breathing comes before stretching.
Start with 90/90 breathing: lie on your back, knees bent, feet on a wall or bench, and exhale fully until your ribs drop and your low back flattens slightly against the floor. That's diaphragmatic bracing, and it's the same brace you should feel at the bottom of a squat or during a loaded hip hold. If you lose that brace during end-range work, you're compensating through your spine, not gaining real hip range.
Cue "chest up, knees out" during goblet squats and PAILs/RAILs, and watch that your knees track over your toes rather than caving in. Feel for glute engagement at end range, not just a stretch sensation in the front of the hip.
Pro Tip: A tiny cue often unlocks more range than another stretch: try gently rotating your femur outward (screwing your feet into the floor) before you sink into a squat. It's a subtle change in core bracing that opens hip space without a single extra stretch.
If you're over 40, gradual exposure beats aggressive ballistic stretching every time. Skip end-range bouncing entirely, extend your warm-up by a few minutes, and expect tissue to respond slower than it did at 25. That's not a limitation to fight; it's just the timeline now.
Red Flags That Mean Mobility Work Isn't the Fix
Most hip stiffness responds to consistent drilling. Some doesn't, and pushing through the wrong kind of restriction makes things worse, not better.
- Sharp, localized joint pain during or after a drill, not a stretch sensation
- One hip losing more than 15 degrees of range compared to the other, especially if it's new
- Repeated catching, clicking, or locking that comes with pain, not just noise
- Groin or hip pain that gets worse under load rather than warming up and easing off
- Numbness, tingling, or weakness anywhere down the leg
If you hit any of these, scale back load, drop the specific drill that provokes it, and take a short deload before deciding whether you need imaging or a physical therapy referral. Some hip range limits come from bone-on-bone morphology, not soft tissue, and no amount of stretching changes the shape of a joint.
A Practical Note From a Lifter Who's Not in a Hurry Anymore
Consistent, boring mobility work beats occasional aggressive stretching sessions, and that's not a controversial opinion once you've been training long enough to watch both approaches play out. The lifters who keep lifting into their 50s and 60s are rarely the ones who spent an hour in a deep stretch once a month. They're the ones who tested first, built motor control before chasing range, and integrated new positions under light load before ever asking a heavy bar to sit in them.
Test before you stretch. Load before you trust it. That order rarely fails.
Pair This Hip Work With the Right Tools From Ironatforty
Drills only work if they fit into a training week you'll actually stick to, and Ironatforty builds that connective tissue between mobility work and the training itself, not just another list of stretches.
Start by pairing your new 90/90 routine with a proper warm-up sequence for heavy lifting so the mobility gains actually show up under the bar instead of fading between sets. If joint discomfort is part of why you're reading this, the joint pain warm-up checklist scales the same drills down for cranky knees and hips. Once you're into week 3 of load integration, use the training hub to structure the strength work around your mobility block instead of letting the two compete for recovery.
If body composition or energy intake shifts while you're training more deliberately, the free calculators help you track that without guesswork, and the 1RM calculator paces your percentage-based loading during those final two weeks. Run your first hip test today and pick your two starting drills before your next session.
Sources
- Training mobility for Olympic weightlifting — Simplifaster
- Mobility routine for Olympic lifts — BarBend
- Hip mobility assessment | PoinT GO Research
- Mobility requirements for Olympic weightlifting — Strength & Sport PT
Use the assessment guides to test, the drill articles to build your program, and the clinical review to know when a restriction warrants a referral instead of another stretch.
FAQ
Can hip mobility actually be improved, or is it mostly genetic?
Hip mobility can be meaningfully improved for most lifters through targeted drills and load integration, though structural bone shape sets a hard ceiling for some people that stretching alone won't move past.
What are the best exercises for hip mobility in lifters?
The highest-transfer drills are 90/90 hip switches, deep goblet squat holds, hip CARs, PAILs/RAILs for internal and external rotation, adductor rockbacks, supported side-lunge mobilization, banded hip distraction, and loaded positional holds.
Does improving hip mobility also help with glute development?
Yes, indirectly. Better hip range lets you reach fuller depth and better positions under load, which lets your glutes actually work through more of their range instead of getting bypassed by lumbar compensation.
What are the signs of poor hip mobility in a lifter?
Common signs include butt wink at squat depth, one heel lifting during a bodyweight squat, unstable catch positions in cleans or snatches, and a noticeable side-to-side difference on a 90/90 or FABER test.
How often should lifters do hip mobility work each week?
Most lifters see measurable change with short daily primers of 5 to 12 minutes plus dedicated mobility sessions of 10 to 20 minutes, 3 to 5 times weekly, across a four-week block.